React Radio Button Example and Tutorial

In this article, We will learn how to work with Radio button in Reactjs app. Working with radio button is little different than other input elements of HTML.
So, here I am going to create a sample application where a basic React component will be used to show the use of radio button in the React app.
Let's Get Started
Step 1: Create React App
create a basic react app using create-react-app tool
npx create-react-app radio-button-app
Once the app is created using above command, Move to project folder using cd radio-button-app/ and start the app using npm start command.
Step 2: Define default Radio Button State
In the above code, We have set the radio button state. Which will be updated as per the user selection.
Step 3: Create Form with Buttons
In the above form, we have defined 4 radio buttons containing the name of 4 different countries. And with the radio button, we have added two properties checked and onChange. Checked properties in the form actually manage the user selection and update the value to the country state.
Now when the user checks any of the radio buttons then the state is updated using the country variable using the onChange event handler.
Step 4: Complete code
In the above code, we can the onSubmit event handler which will trigger on the submit of the form. Have usede.preventDefault() method to prevent the page redirection after form submit.
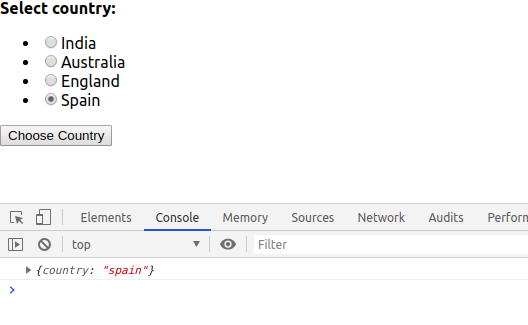
Working will app looks like below:

Conclusion
We have successfully created a sample application to work with radio button in react.js app very easily in few minutes only.
If you are new to React then find here Reactjs Sample Projects to start the app for enterprise-level application
Let me know your thoughts over the email demo.jsonworld@gmail.com. I would love to hear them and If you like this article, share it with your friends.
Thank You!
Find other similar Articles here:
- What are the Different way of using useEffect in React
- How to Get URL Parameters in Reactjs Application
- How to Convert React Web Application to Mobile Application
- React + Fetch - HTTP GET Request Examples
- What are the Different ways to Style React Component
- Client Side Rendering vs Server Side Rendering in Reactjs