CRUD Application in React Example and Tutorial

Hey there, Today we will proceed to create a demo for CRUD with React, Express, Node.js and MongoDB(MERN Stack).
Below are the requirements for creating the CRUD on MERN
- Node.js
- React.js
- Mongodb
- IDE or Text Editor
I assume that you have already available the above tools/frameworks and you are familiar with all the above that what individually actually does.
As we know that we can easily start working on React.js with create-react-app tool. Here I will skip this, Because you would be familiar with the basic stuff of React.js. If you are not aware of creating React.js app with the above tool. React my article on it Getting Started with React.js
Let's Get Started
Step 1: Configure React Routing after creating React.js app
In this sample application, I will show here CRUD operation of documents having three input fields in it. After setting app the React basic app we need to install the next dependency with the below command:
npm install react-router-dom --save
Step 2: Create needed components and service
At first, create a folder named components inside the src folder and create different component files needed for CRUD operations. Create Service file named Document Service.js and put the below code inside it for making all HTTP request:
Code AddDocument.js file
In the above file, We have form with three fields title, description and publisher. Inside the constructor, We have set the variable in the state which will be updated with the help of handleChange method call on onChange event of input field. You can read official doc to know more about the state and props.
Code for ListDocument.js file
In the above file, We are calling list of document, We are using axios for making HTTP request. And document service is imported for all the http request. Also we can call the data in the component which I have tried to show you in the above file. You may think this a mistake but its made in the way to clear the concept for beginner level programmer. Apart from the above imports, we have imported TableRow for binding the fetched data with template.
Code for TableRow.js
Code for EditDocument.js
Now our component and service related task is done, In the above files we have created service for making HTTP request. And separate files for adding a document, listing documents, edit document. Now the next thing is to set the route
Step 3: Update index.js
Open index.js file under src and put the below code.
We are almost done with the code needed to do at client end.
Step 4: Create Server
Since I have already posted an article for CRUD application with angular. So please follow article from there for creating server for CRUD application Angular6 CRUD Application with NodeJS and Mongodb
Step 5: Start the client and server
After completing all these steps, We need to start the client app and server app over the terminal in the project folder
npm start // for react app
node server.js // for nodejs app
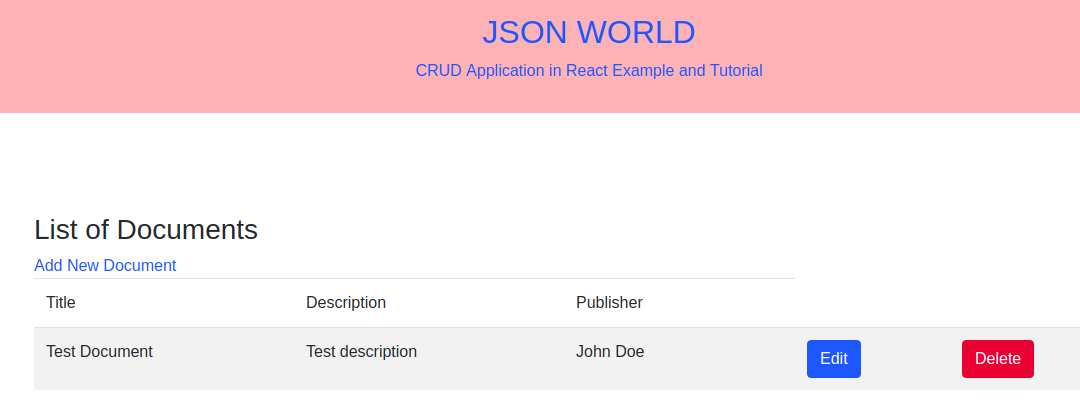
Over the browser we will have page like below:
Document list page
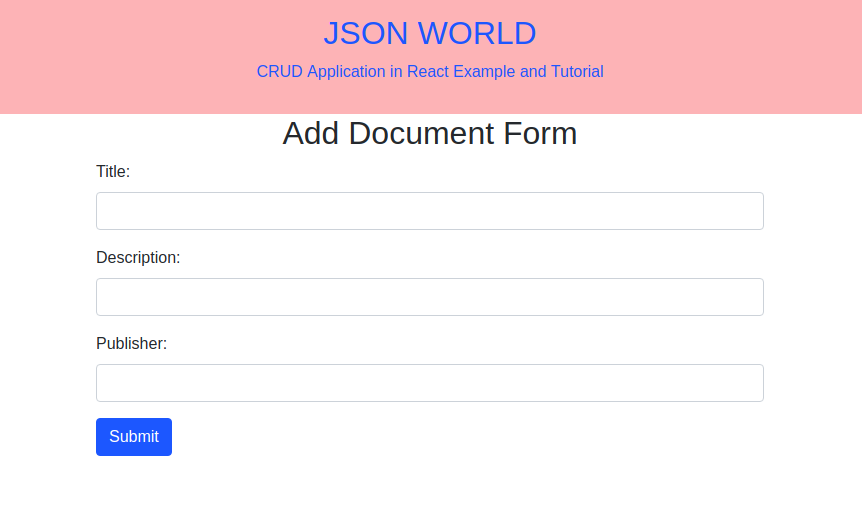
Add document page will look like below over the browser:
Conclusion
So in this article, We learn to create CRUD application in React.js step by step with much less code. You can also find other demos of React.js Sample Projects here to start working on enterprise level application.
That’s all for now. Thank you for reading and I hope this demo will be very helpful for CRUD Application in React Example and Tutorial application.
Let me know your thoughts over the email demo.jsonworld@gmail.com. I would love to hear them and If you like this article, share with your friends.
Find complete source code over GitHub
Find other similar Articles here:
- What are the Different way of using useEffect in React
- How to Get URL Parameters in Reactjs Application
- How to Convert React Web Application to Mobile Application
- React + Fetch - HTTP GET Request Examples
- What are the Different ways to Style React Component
- Client Side Rendering vs Server Side Rendering in Reactjs
Other Articles
-
 Getting Started with react.js
-
Login with Facebook and Google in React App
-
Login with Git and Microsoft in Reactjs Application
-
How to Fetch Data from Third-party API in Reactjs
-
Simple Pagination in React.js App
-
Form Validation in React.js Application
-
Custom Dropdown Selectbox Example in React.js
-
Autocomplete in React.js Example And Tutorial
-
React.js Custom Modal Example & Tutorial
-
How to use Axios with ReactJS Application
-
How to use localStorage with React
-
React Radio Button Example and Tutorial
-
Uploading file with React.js and Node.js
-
Basic React User Registration Login App Without Redux Example and Tutorial
-
React + Redux - User Registration and Login Example & Tutorial
-
React 16 Datepicker Example with react-datepicker
-
CRUD Application in React.js with Hooks Example and Tutorial
-
Create Basic React Hooks Application for Fetching List
-
Create Responsive Carousel with React
-
Angular or ReactJS Which is Better in 2019?
-
Getting Started With React.js
-
What is Virtual DOM in React and How Virtual DOM works?
-
Angular vs React vs Vue - A Detailed Comparison
-
Functional and Class Components in ReactJS
-
Different ways of using Bootstrap 4 in React application
-
What are the different ways to make HTTP Request in Reactjs application
-
Conditional Rendering in React Example & Tutorial
-
How to Check Version of React Application
-
How to generate PDF in React.js Application
-
Single and Multiple Image Preview in React Application
-
React onClick Event Handling with Examples
-
Lifecycle methods in React 16
-
How to Display List in Reactjs Example
-
GET Request in React.js using Fetch Example and Tutorials
-
Start Working with React Context API
-
Set up Lazy Loading in React Application
-
Communicate Between Components with Observable Subject in ReactJS
-
What is GraphQL? How GraphQL is different from REST API?
-
How to Deploy React App over Firebase Hosting
-
How to use Interceptor with React to set Auth header with API request
-
Show Loading Spinner after Submit with React Hook Form
-
What are the limitations of ReactJS?
-
What are the Different Ways to Optimize a Reactjs Application
-
Client Side Rendering vs Server Side Rendering in Reactjs
-
What are the Different ways to Style React Component
-
React + Fetch - HTTP GET Request Examples
-
How to Convert React Web Application to Mobile Application
-
How to Get URL Parameters in Reactjs Application
-
What are the Different way of using useEffect in React