How to use Interceptor with React to set Auth header with API request

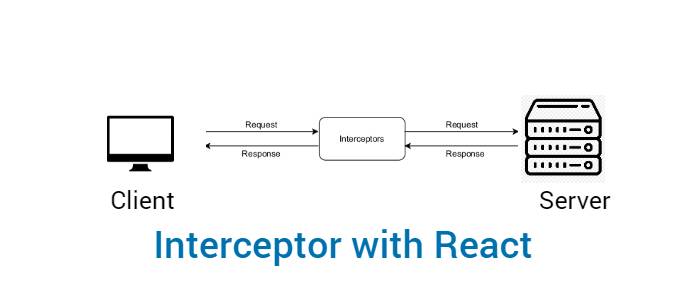
While working with API in any of the client side technology, We mainly make request to the API which mostly remains same throughout the application and also we need to send common header for all the authenticated request. So handling such situation Interceptor is used.
What are HTTP Interceptors?
Interceptors provides use the way to intercept incoming or outgoing HTTP requests using the client packages(in Angular we use HttpClient and in React axios can handle it itself). It can handle both HttpRequest as well as HttpResponse.
Common Use Cases of Interceptors
- Add an auth token(for authenticated request) or some custom HTTP header for all outgoing HTTP requests.
-
Catch HTTP responses to do custom formatting before transferring the data to the service/component.
-
print all HTTP requests in the console using console.log.
In this article, We will learn about the use of Interceptor with ReactJS application.
Add a request interceptor
In the above example, we can see authorization token has been added in the request header, and while using the interceptor we need to write the code in only one place. We may need to add the request header in every service file to add anything in the request.
Note: For simplicity, I have directly accessed the localStorage in the above code, While working on any kind of project we create a service for that task.
Add a response interceptor
In the above code, We are mainly trying to update the auth token when it gets expired and getting error responses from the server due to the token expiring. Here in the code interceptor checks if the server has returned 401 error code(which is returned due to token expire), In that case, we have written the code to update the token and made the request again.
Conclusion
Interceptor helps us to add/update the HTTP requests by intercepting them while making the HTTP requests. It is very useful when there is a need to add custom headers to the outgoing request, log the incoming response, etc.
For a developer, It is highly recommended to use Interceptor in the project. Let me know your thoughts over email pankaj.itdeveloper@gmail.com. I would love to hear them and If you like this article, share it with your friends.
Find other similar Articles here:
- What are the Different way of using useEffect in React
- How to Get URL Parameters in Reactjs Application
- How to Convert React Web Application to Mobile Application
- React + Fetch - HTTP GET Request Examples
- What are the Different ways to Style React Component
- Client Side Rendering vs Server Side Rendering in Reactjs