Start Working with Voice Driven Application with Nodejs

Artificial intelligence has the potential to offer $15.7 trillion to the global economy by 2030. We all already encounter it every day. Simply think the scenerios of daily life when Amazon recommended a book to you or Netflix suggested a film or TV show. All these recommendations are based on algorithms that examine what you've bought or watched or on the base of other activity we do over internet. The algorithms learn from those purchases, using them to suggest other things you might enjoy. Artificial intelligence lies behind those algorithms.
Simple artificial intelligence even filters your incoming emails, diverting spam away from your inbox. It works better than software rules because it learns what could be spam based on the content of the email. The artificial intelligence even builds a model based on your preferences -- what is spam to you may not be spam to another user.
Artificial intelligence goes so much further than recommending a book or filtering your emails.
So, In this article, I am going to create a demo application in Node.js to manage the video play, stop and other activity with voice. The voice manipulation gets easier for web pages by Javascript API for speech recognition.
Let's Get Started
Step 1: Create Node.js Application
// make project directory
mkdir voice-driven-nodejs-app
// move to project folder
cd voice-driven-nodejs-app
// initialize the npm
npm init --yes
// install required package
npm install https express
Step 2: Generate Private key and certificate
openssl genrsa -out privatekey.pem 1024
openssl req -new -key privatekey.pem -out certrequest.csr
openssl x509 -req -in certrequest.csr -signkey privatekey.pem -out certificate.pem
Step 3: Create Server File for Nodejs application
Create file with touch server.js and put the below code inside this file
Step 4: Create index.html
Create a file under public directory
// create a public/index.html file
mkdir public && cd public && touch index.html
Open the file and put below code inside the body tag of the html page
Step 5: Create main.js under the public directory
Create file with touch main.js and put below code inside it.
Step 7: Create RemoteControl.js under the public directory
create a new file with touch RemoteControl.js and put below code insite it
Final Step: Run the App
Run the app with below command
node server.js
Now navigate to URL: https://localhost:8000/ over browser. A Page will open like below:

Click on advanced:
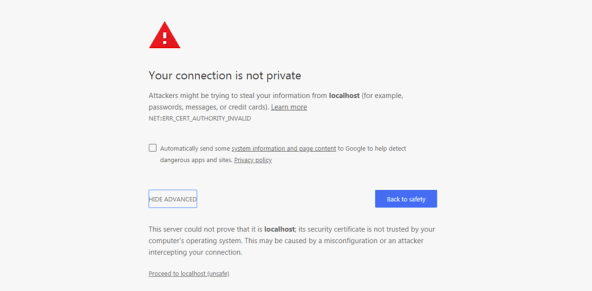
And then Proceed to localhost (unsafe)
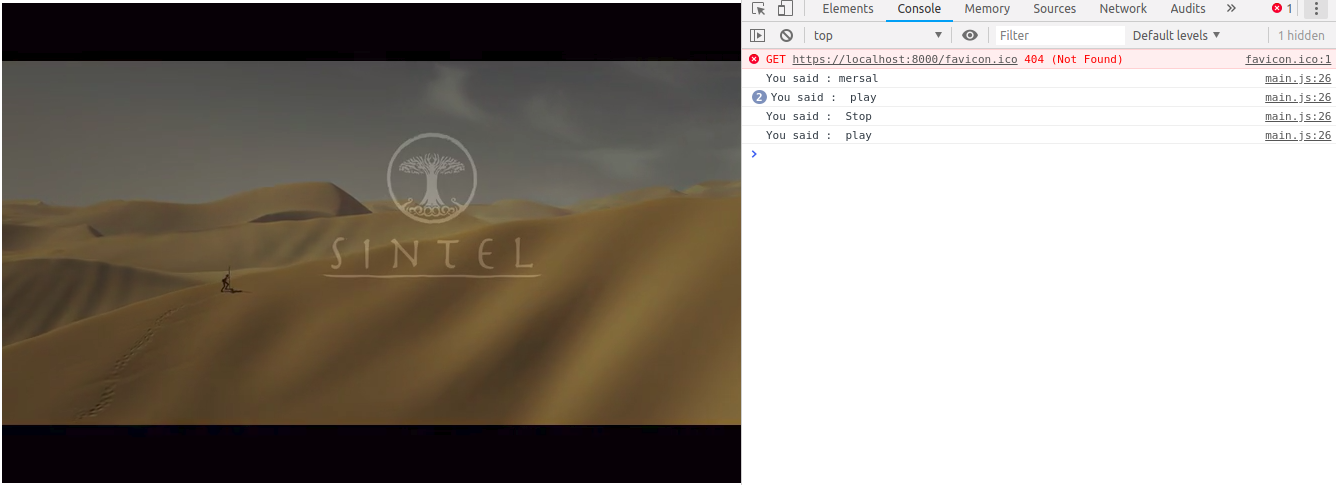
Now we can access the video by saying play/stop/mute/unmute
Conclusion
So in this demo, We tried to Start Working with Voice Driven Application in Nodejs Application. You can also find other demos of Nodejs Sample Application here to start working on enterprise level application. Credit for the demo goes to : click here to see
That’s all for now. Thank you for reading and I hope this demo will be very helpful how AI can be integrated with Node.js and about the use of AI in our daily life.
Let me know your thoughts over the email demo.jsonworld@gmail.com. I would love to hear them and If you like this article, share with your friends.
Find other similar Articles here:
Other Articles
-
 Nodejs Cluster Module | Performance Optimization
-
Cron Job with NodeJS
-
Upload files to server using Node.js ejs template and Multer package
-
File upload using angularjs and nodejs multer module
-
Send email using angularjs and nodejs nodemailer module
-
Nodejs auth app using passport local and ejs template
-
Twitter authentication using nodejs ejs template and mysql
-
Github Authentication using Nodejs
-
Authenticate API Using JWT(Token Based) in NodeJS
-
How to Convert Excel to Json in Nodejs Application
-
Server Side Pagination with Nodejs and MongoDB
-
Login with Facebook in Node.js Express Application
-
Start Creating API in NodeJS with Mongodb Using Express Framework
-
Download remote server files using Node.js
-
Create Restful API with nodejs and mysql database
-
Paypal Integration in Nodejs Application
-
How to Submit Form with Ajax in NodeJS App
-
Twillio Direct Audio call integration with Nodejs Express
-
Implementing Google reCAPTCHA in Node.js Application
-
Angular6 CRUD Application with NodeJS and Mongodb
-
Start Working with Promises in Node.js
-
How to Resize Image in NodeJS
-
How to Implement Memcached in Nodejs Application
-
Login with Google in Node.js Application
-
Login with LinkedIn in NodeJS Application
-
Angular7 CRUD with nodejs and mysql example
-
Amazon Cognito User Pools In Node.js Application
-
Payment With Stripe in Node.js Application Example & Tutorial
-
Caching with Redis in Node.js Application
-
How to upload base 64 image in Nodejs Application
-
Start Creating APIs in Node.js with Async/Await
-
Video Streaming with Node.js
-
Integrate CardConnect Payment with Node.js
-
How to connect Nodejs with PostgreSQL
-
Uploading file with React.js and Node.js
-
Testing NodeJS API with Mocha and Chai
-
Create Basic Nodejs Express App using Jade Template
-
User Authentication In Node.js Application
-
Node.js Event Loop Explained
-
Most Popular Node.js Frameworks
-
5 Most Popular Hacking Tools
-
Best Practices for NodeJs App Developer
-
Best Sites Built With Node.js
-
How To Zip And Download Files In Nodejs
-
How To Merge PDF Files In Node.js Application
-
How To Send Email Using SendGrid In Node.js Application
-
How To List All The Globally Installed NPM Packages
-
How To Enable Cors In Node.js Express
-
How To Download File From Node.js Server
-
How To Convert Text To Speech In node.js
-
Serve Static Files In Node.js
-
How To Optimize Performance With GZIP Compression
-
How To Handle Cookies In Node.js Express App
-
Enable HTTPS in Node.js Express Application
-
Update Package Version in Package.json
-
Nodejs vs Golang
-
How to Setup a Simple HTTP Server/ Local Web Server with NodeJS
-
What is Deno? How it is different from Node.js?
-
Most Useful NodeJS Libraries a Nodejs Developer Should Know
-
Read and Write Data to Local JSON File with NodeJS
-
How to secure NodeJS REST API from Attacks
-
How to Delete Files in Node JS
-
What is NPM?
-
Explain Callback Function in NodeJS
-
Most Common AWS Services a NodeJS Developer Should Know
-
How to Prevent SQL Injection in a NodeJS API