Communication Between Components Using Input decorator in Angular
In Angular app development, We all come across a situation to share data and information with another component. A component can share data to each other in various ways, these are:
- Using @Input()
- Using @Output()
- Using Services
- Parent component calling ViewChild
- Parent interacting with a child using a local variable
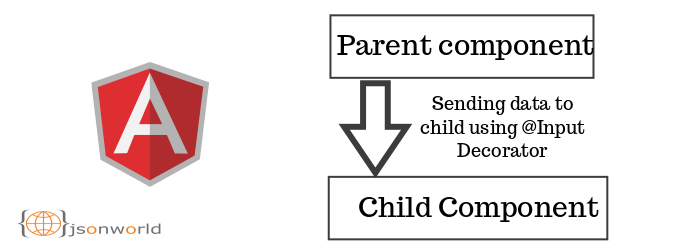
A component can be used inside another component, thus creating a component hierarchy. The component used inside is known as the child component and the enclosing component is known as the parent component. Today, In this demo, We will discuss the sharing of data from parent to child component using the @Input decorator, We will also looking into a modification of the input message and logging in the input message. In the image at top, you can understand the data flow.
Let's proceed step by step
1. Create a basic angular app
ng new data-communication-via-input
after that switch to the project folder with cd /data-communication-via-input. Once we create app with ng new then a default component is generated, we will use that component as parent component and create a new component for using as a child component.
ng generate component appchild
For easy understading we will do all stuffs in ts file only, will not use html files.
2. start with passing data from the parent component to the child component
made change in parent component, app.component.ts.Let's have look in the code inside it:
In the parent component, at the top we have imported child component for communication from parent to child component. After that in the component decorator we have removed templatedUrl & styleUrls. And set html code in template to make the stuffs easy. In the template we have child component selector tag with the key which value we want to pass in child component and modify it later in child component. Under the exported class we have set value of two variables message(which we want to show from parent component) and childmessage(which we want to send in child component).
After making changes in parent component, now we need to make changes inside the child component.
Since we have to receive data from parent component, For this we need getter( to receive data from parent component) and setter (to modify the received data from parent component) on the input property.
Suppose we want to intercept an incoming message in the child component and modify it with some string. To achieve this, we created a property called _greetmessage and using @Input() decorator creating getter and setter for the _greetmessage property. In the getter, we are intercepting the input from the parent component and combining it with the string. This can be done as shown in the code below
Let's have a look inside the child component, appchild.component.ts
Here in the above child component file, I have set template key to set the html code in ts file. In html code we have used variable which have been modified in the setter method of input decorator.
Conclusion
In this article, we learned to create demo how to communicate from a parent component to a child component. We also saw how to intercept the input message and log changes. In further demos, we will explore with other types of component communication.
That’s all for now. Thank you for reading and I hope this post will be very helpful for communcating data from parent component to child component.
Let me know your thoughts over the email demo.jsonworld@gmail.com. I would love to hear them and If you like this article, share with your friends.
Find other similar Articles here:
- Different Ways to Optimize Image in Angular Application
- Display Array Items over template in Angular Application
- Use HTTP Interceptor to Set Auth Header for API Requests with Angular
- Different ways to get form data in Angular Component
- How to Add Script Dynamically in Angular Application
- How to Use Absolute Paths For Module Imports in Angular
Other Articles
-
 Getting Started with Angular2
-
Introduction to Angular2 Routing
-
Http calls in Angular app
-
Web Push notifications in Angular Applications
-
Simple Pagination for Angular2 application
-
Create a Search Pipe to Dynamically Filter data with Angular
-
Angular form validation example and tutorial
-
Angular6 CRUD Application with NodeJS and Mongodb
-
Angular7 CRUD with nodejs and mysql example
-
Communication Between Components Using Output decorator and EventEmitter in Angular
-
How to Check Internet Connection in Angular Application
-
Create Drag and Drop in Angular7 Application
-
Owl Carousel with Angular
-
Share data between angular components using service
-
Angular6 Login And Registration Example And Tutorial
-
Add Loader in Angular6 application
-
Angular7 Custom Modal Using Angular Material Tutorial
-
How To Convert HTML Page To PDF In Angular Application
-
Child Routing In Angular Application
-
Server Side Pagination in Angular Example and Tutorial
-
Angular 8/9/10 Pagination Example and Tutorial
-
Angular 8/9 Template-Driven Form Validation
-
Angular 8/9 Reactive Form Validation Example and Tutorial
-
Angular 8/9 Communication between Components using Subject and Observable
-
Angular 8/9 User Registration and Login Example and Tutorial
-
Lazy Loading Modules in Angular 8
-
How to connect Firebase with Angular 8 Application from scratch
-
Deploy Angular Application to Firebase Cloud Hosting
-
How to Read Local JSON file in Angular
-
Firebase Email Password Authentication in Angular 8 Application
-
Angular Firebase CRUD(Create, Update, Read, Delete) App
-
Build a Progressive Web App with Angular 9/8
-
Firebase Login with Facebook in Angular 9/8
-
Unit Testing Angular 9/8 Application using Jasmine & Karma Example
-
Angular 9|8|7 Select dropdown example with Reactive Form
-
Angular 6 & Its Features
-
Angular or ReactJS Which is Better in 2019?
-
Cascading Dropdown In Angular
-
How To Use JQuery In Angular CLI Project
-
Understand Angular Directive with Example
-
Update Package Version in Package.json
-
Latest updates in Angular 8 in brief
-
Difference between Reactive forms and Template driven forms in Angular
-
Retrieve Parameters and Query String values from URL in Angular 8
-
How To Update Angular CLI To Version 9
-
How to Check Installed Angular CLI Version?
-
Angular 9/8 NgClass Directive example
-
How to handle Checkboxes in Angular Application
-
How to Export Data to Excel File in Angular Application
-
Difference between NgOnInit and Constructor in Angular
-
How to dynamically style Angular Components templates using ngStyle & ngClass?
-
Integrate Google Maps in Angular Application
-
Allow Only Numbers in Textbox in Reactive Form Angular
-
Upgrade Local Angular CLI to Version 10 using NPM
-
Angular 10 Server Side Pagination using ngx-pagination Example
-
Angular CLI Cheat Sheet: The CLI command An Angular Developer Should Know
-
How to Use Absolute Paths For Module Imports in Angular
-
How to Add Script Dynamically in Angular Application
-
Different ways to get form data in Angular Component
-
Use HTTP Interceptor to Set Auth Header for API Requests with Angular
-
Display Array Items over template in Angular Application
-
Different Ways to Optimize Image in Angular Application